What Happens After You Order a Pikcha Photo Booth: Your First 30 Days
You have paid the advance. The order is confirmed. Now what?
This is the part that stops people from buying — not the price, not the ROI, but the fear of the unknown. "I've never done this before. What if I don't know what I'm doing?"
Here is exactly what happens, day by day, from the moment you order to the moment you earn your first ₹1 lakh. No surprises.
Week 0: Before Delivery (Day 1–14)
Day 1: Order Confirmed
You have contacted Bamigos, chosen your tier (Lite, Studio, or Pro), and paid the 50% advance via bank transfer.
What Bamigos does now:
- Your booth enters the production/preparation queue at the Delhi factory
- Your operator dashboard account is created (you will receive login credentials by email)
- If Pro tier: customisation brief is confirmed (cabinet colour, logo files, UI design)
What you should do now:
This is your location window. Use the 7–21 days before delivery to secure your mall placement.
Day 1–3: Mall shortlisting. Identify 3 malls in your city. Use the location scorecard to rank them.
Day 4–7: Mall visits. Visit each mall on a Saturday and a weekday. Photograph potential spots. Meet the leasing team. Get rate cards.
Day 7–10: Negotiation. Request quotes from your top 2 malls. Negotiate: revenue-share preferred, or 3-month trial at reduced fixed rent. Ask about CAM charges, security deposit, and electrical access (you need one 15A power socket within 3 metres of your spot).
Day 10–14: Lease signed. Confirm your spot. Pay the security deposit. Inform Bamigos of your delivery address and preferred delivery date.
Day 7–14: Manufacturing Complete
Bamigos completes assembly, loads software, tests all components, and runs a 24-hour burn-in. You receive a "ready for dispatch" notification with photos of your packaged booth.
Balance payment due now. Pay the remaining 50% before dispatch.
Week 1: Delivery and Setup (Day 15–21)
Day 15–18: Delivery
Delhi NCR: Same-day or next-day delivery by Bamigos logistics.
Metro cities: 3–5 days via surface transport in wooden crate packaging.
Other cities: 5–10 days.
You receive crated boxes at your mall or a staging location. Inside:
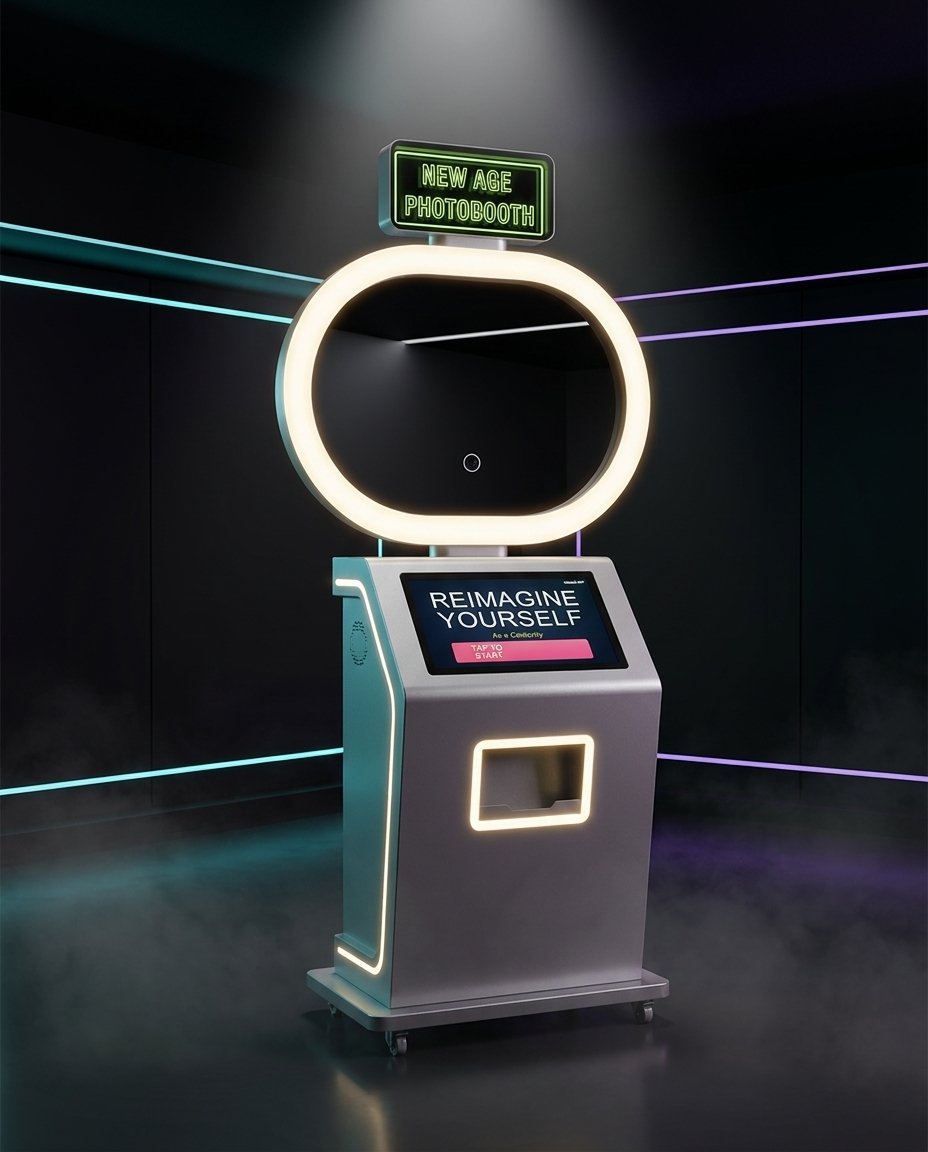
- The Pikcha AI Photo Booth in 3 pieces (cabinet, screen module, and top assembly)
- Power cable
- Ethernet port built into the booth (for wired internet connection)
- Assembly instruction video link (QR code on the box)
- Print consumables starter kit (if purchased)
- Quick start guide (laminated, 1 page)
- Operator dashboard login credentials (also emailed)
Day 18–19: Assembly and Setup
Think IKEA, not rocket science. The booth arrives in 3 pieces. You watch the instruction video, follow the steps, and assemble it with one other person. No special tools, no technical skills. If you have ever assembled a bookshelf, you can assemble this booth.
Total time: 60–90 minutes (assembly + setup). You need one other person to help with the heavier pieces.
Step 1 (30–45 min): Assemble. Unbox the 3 pieces. Follow the instruction video step by step. Attach the screen module to the cabinet, mount the top assembly, connect the internal cables (clearly labelled connectors — they only fit one way). Position the assembled booth at your mall spot with the screen facing the highest-traffic direction.
Step 2 (5 min): Plug the power cable into the nearest 15A socket. The booth powers on automatically.
Step 3 (5 min): Connect to internet. The booth has a built-in ethernet port. Connect it to your venue's internet router with a standard LAN cable. This is the simplest and most reliable option. If you need wireless connectivity (WiFi adapter or 4G SIM router), these are available separately from Bamigos at additional cost — useful for locations where running an ethernet cable is not practical.
Step 4 (5 min): Load the printer. Open the printer compartment (the video shows you exactly how). Insert the paper roll and dye ribbon. Close the compartment.
Step 5 (5 min): Test. Run one session yourself. Pay ₹149 via UPI. Select an effect. Pose. Watch the AI process your photo. Collect the print. Check WhatsApp for the digital delivery.
Done. The booth is live. You are in business.
Day 19: First Login to the Dashboard
Open the operator dashboard URL on your phone browser (or laptop). You will see:
- Live status: Online / Offline
- Today's sessions: 0 (it is your first day)
- Today's revenue: ₹0 (same)
- Printer media level: Full
- System health: All green
Bookmark this page. This is your daily 30-second check for the next 12+ months.
Week 2: First Revenue (Day 22–28)
Day 22 (First real day of operation)
The booth is on. Mall is open. Now what?
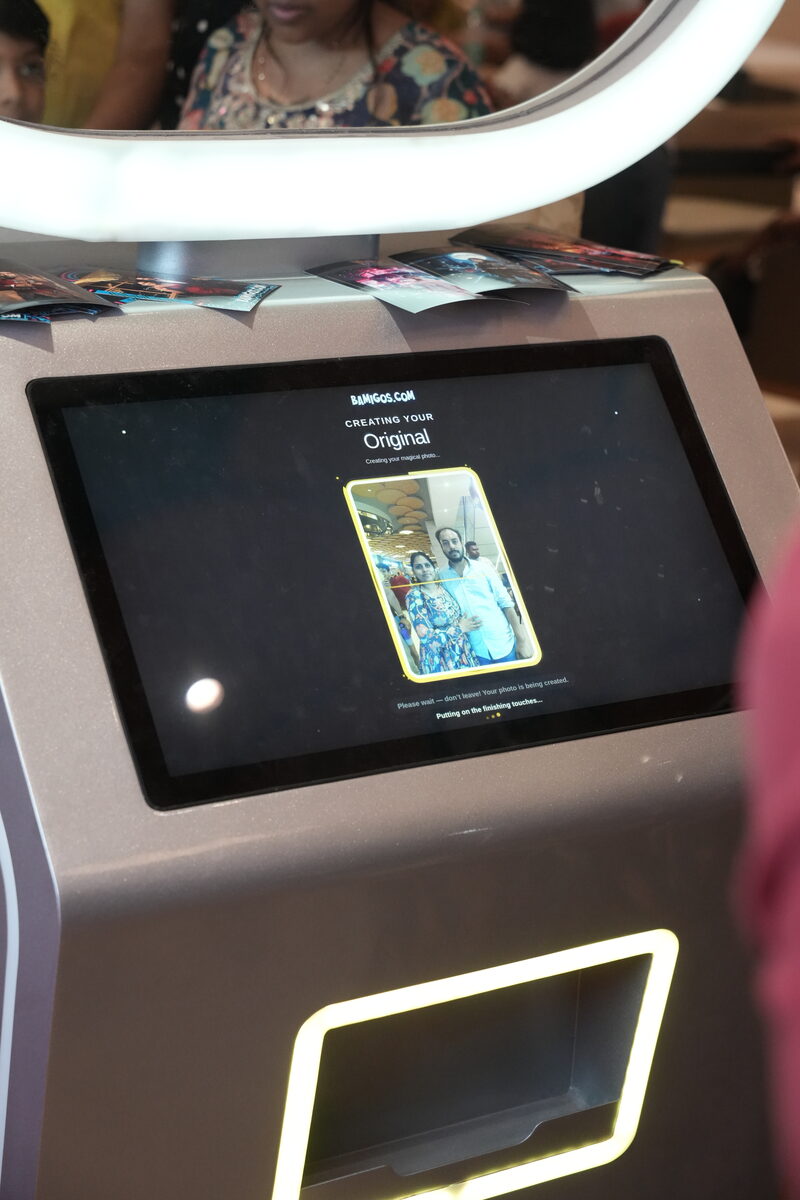
What happens: For the first 1–2 hours, people walk past and look. They are curious but hesitant. The touchscreen displays sample AI photos on a loop — a woman transformed into a Bollywood star, a kid as a superhero, a couple in a K-pop frame. These attract attention.
Around 11 AM–12 PM, the first brave customer scans the UPI code. They pay ₹149. They select the Bollywood effect. The countdown begins — 3, 2, 1, click. The AI processes for 15 seconds. The result appears on screen. They laugh. The print slides out. They take it. They scan the QR code for WhatsApp delivery.
That ₹149 is your first revenue. All UPI payments are collected by Bamigos and transferred to your bank account bi-weekly (every two weeks). You see every transaction in real time on the operator dashboard — the money accumulates and hits your account on the settlement cycle.
By end of day 1, you will likely have 8–15 sessions. Revenue: ₹1,200–₹2,200. Low — but real.
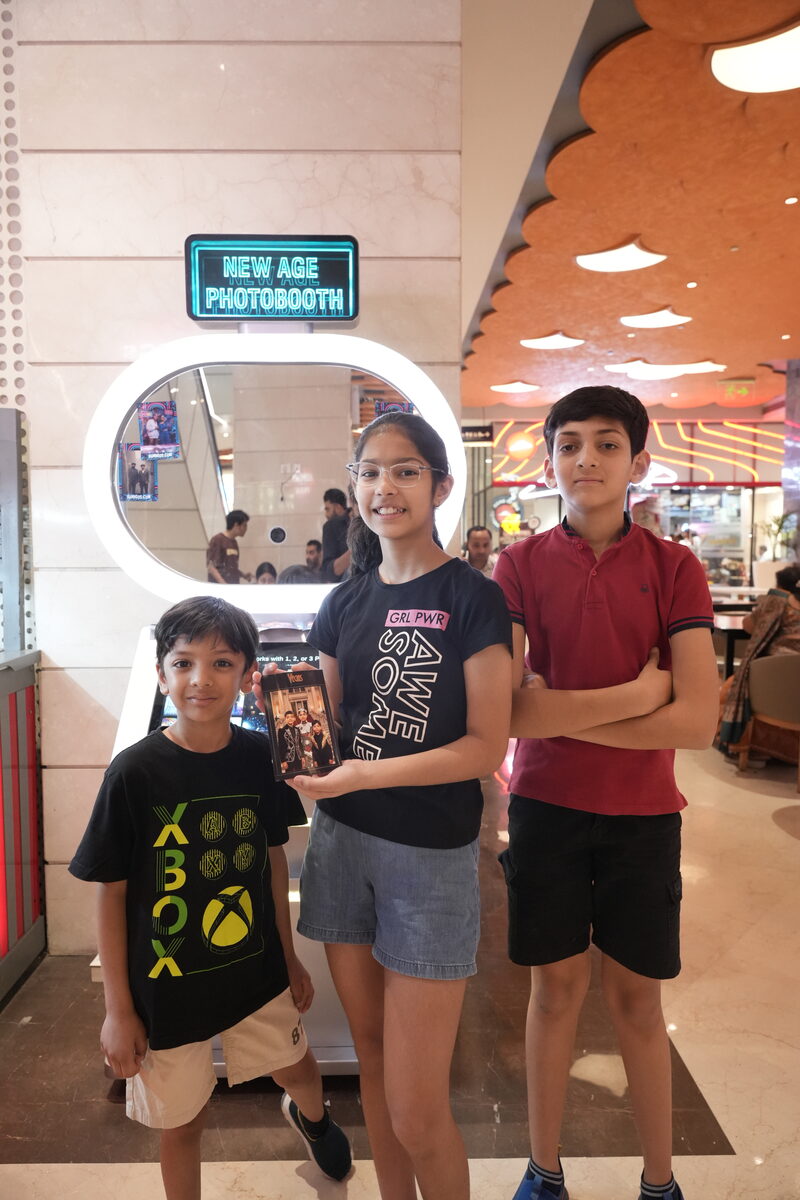
Day 23–24: Word Starts Spreading
The first customers share their AI photos on WhatsApp and Instagram. Their friends see it. "Where was this?" "Which mall?" By day 3, you notice the session count ticking up. 15–25 sessions.
Day 25–28 (First Weekend)
This is the moment the business proves itself.
Saturday and Sunday traffic at malls is 2–3x weekday traffic. Families are out. Friend groups are hanging out near the food court. Couples are browsing.
Expected sessions on your first weekend day: 30–50.
Planning a Gaming Zone?
Get expert recommendations and pricing for your venue: including the Pikcha AI photo booth, the highest-ROI attraction you can add. No obligation.
Expected revenue on your first weekend day: ₹4,500–₹10,000.
By end of Week 2, your dashboard shows:
- Total sessions: 120–200
- Total revenue: ₹18,000–₹30,000
- Average sessions/day: 17–28
Not ₹1 lakh yet. But the trajectory is clear.
Week 3: The Flywheel Kicks In (Day 29–35)
The Social Media Effect
Every AI photo shared on WhatsApp or Instagram is free marketing. By Week 3, dozens (eventually hundreds) of people in your city have seen a friend's AI-transformed photo tagged at your mall. Curiosity drives new visitors.
What you see in the dashboard:
- Weekday sessions climbing from 15 → 25 → 35
- Weekend sessions climbing from 30 → 50 → 65
- New effects being tried (customers are exploring beyond the top 5)
- Repeat visitors appearing (same UPI IDs, different effects)
Day 30: Your First Month P&L
Let us add up your first month realistically:
| Week | Sessions | Revenue |
|---|---|---|
| Week 1 (partial — setup + 3 days live) | 30–45 | ₹4,500–₹6,700 |
| Week 2 | 120–200 | ₹18,000–₹30,000 |
| Week 3 | 180–300 | ₹27,000–₹45,000 |
| Week 4 | 220–350 | ₹33,000–₹52,000 |
| Month 1 Total | 550–895 | ₹82,500–₹1,33,500 |
Month 1 expenses:
- Mall rent: ₹15,000–₹40,000
- Print consumables: ₹19,250–₹31,325 (at ₹35/print)
- Electricity + internet: ₹2,500
- Total expenses: ₹36,750–₹73,825
Month 1 net profit: ₹45,750–₹59,675 (conservative) to ₹82,500–₹1,33,500 minus expenses.
Realistically, your first month net is ₹30,000–₹70,000. Not the full ₹1L+ yet — that comes in month 2–3 as sessions ramp to steady state.
Week 4–8: Reaching Steady State
Month 2
The ramp-up continues. By the end of month 2:
- Weekday sessions: 30–45/day
- Weekend sessions: 50–80/day
- Monthly gross revenue: ₹1,20,000–₹2,20,000
- Monthly net profit: ₹60,000–₹1,20,000
You have likely covered your initial investment (₹4.13L for Lite) in cumulative profit by end of month 2–3.
Month 3
Steady state. Sessions plateau at a sustainable level determined by your mall's footfall and your booth's placement. This is your baseline.
From this point forward, revenue fluctuates seasonally:
- Diwali/Christmas/New Year (Oct–Jan): +30–60% above baseline
- Wedding season overlap (Nov–Feb): steady or +10–20%
- Summer holidays (May–Jun): +10–20% (families at malls)
- Monsoon (Jul–Sep): −10–20% (lower mall footfall)
Month 6
By now you know your numbers cold. You have 6 months of dashboard data. You know your best days, your worst days, your most popular effects, and your optimal pricing.
This is when most operators make their scaling decision:
- Add a second booth at a different mall (most common)
- Upgrade from Lite to Studio at the same location (for higher visibility)
- Switch to Pro tier and go full white-label to build a branded network
Your Weekly Routine at Month 6
| Day | Task | Time |
|---|---|---|
| Monday | Check dashboard on phone during lunch | 30 seconds |
| Tuesday | Nothing | 0 |
| Wednesday | Nothing | 0 |
| Thursday | Check dashboard | 30 seconds |
| Friday | Nothing | 0 |
| Saturday | Drive to mall. Restock paper. Wipe screen. | 30 minutes |
| Sunday | Nothing | 0 |
| Weekly total | ~31 minutes |
That is your entire time commitment for a business generating ₹50,000–₹1,20,000 per month.
What If Something Goes Wrong?
The printer jams
Open the printer compartment. Remove the jammed paper. Reload. Close. Resume. 5 minutes. Happens 1–2 times per month.
The screen freezes
Hold the power button for 10 seconds. The booth restarts. Takes 2 minutes to reboot. Happens rarely (once every few months).
A customer complains about print quality
Check the printer ribbon. If it is running low (the dashboard will have warned you), replace it. Print quality issues are almost always caused by low ribbon levels.
You see "Payment Error" on the dashboard
Usually a UPI network glitch lasting 5–15 minutes. The booth automatically retries and displays "service temporarily paused" to customers. No action needed from you. If it persists for more than an hour, contact Bamigos support.
Something you cannot fix
Call or WhatsApp Bamigos support. Lite SLA: 48 hours. Studio SLA: 24 hours. Pro SLA: 4 hours. For Pro tier, a loaner unit is shipped to you if the repair takes more than 48 hours.
Ready to Start Your 30-Day Journey?
The path from "I'm interested" to "I earned my first ₹1 lakh" is shorter than most people think. 14 days to delivery. 1–2 hours to assemble and set up. 30 days to first meaningful revenue. 60–90 days to steady state.
Step 1: Contact Bamigos — tell us your city and target venue.
Step 2: Receive your quote within 24 hours.
Step 3: Place your order. Start your 30-day countdown.